We installed a swale water catchment system in our orchard area last month. A swale is a sort of ditch laid on contour. Its job is to collect water, slowing its movement down so that it soaks into the soil and forms a "lens" of stored water beneath a berm. Anything planted on the berm benefits from this natural irrigation. You can read about how we installed our swale system here.
The north swale on the day of installation. Photo courtesy of Steve Moring, Vajra Farm LLC
It has been pretty dry, so we really haven't seen it fully in action until today. As of this writing, we have received nearly 3.5" of rain over the course of about 3 hours. It is clear how useful a tool the swale system is going to be.
After 3.2" of rain, the water in the swales stood about 15 inches deep
Our swales are relatively shallow because our soil doesn't percolate water very quickly. Depending on your soil type, you may have deeper or more shallow swales.
If you look carefully in the lower lefthand corner, you can see the white overflow drain that feeds the pond.
Our swales not only water the trees and other plants on the berms but they also serve to fill our new duck and goose pond. Once the water in the swales reaches a certain level, it flows into an underground drain pipe that connects the two swales.
The pond filling up! You can see the water entering from the swale drain on the left. The pond was completely empty prior to today's rain. The pipe on the right is an overflow outlet.
The water then flows via gravity through the drain pipes downhill into the pond. The pond is approximately 20 ft. across and 5 ft. deep. It filled in less than 3 hours.
All we need to do is figure out our fencing situation and the ducks and geese will be able to enjoy their new pond. This is a considerable upgrade on the kiddie pools they've been using!
Note: Some links included in this post are affiliate links. Click here to read our disclosure statement.
We had the honor of having members of the Kansas Permaculture Collaborative over for two "permablitzes" on our farm over the past couple of weekends. We had people drive in from as far away as Salina and Kansas City to help us complete a swale building project for our food forest. I can't describe how thankful and humbled I feel after the outpouring of help and comraderie. Permaculture people are good people.
The southwest edge of our property will be devoted to a food forest planted around a hugelkulture bed and two swales. Excess water from the swales will be diverted to the duck and goose pond
We enlisted the help of Steve Moring of Vajra Farm LLC in developing a plan for our property. I have read about permaculture for years but felt like I lacked the experience needed for planning the water catchment systems in particular. Steve's help has been invaluable for putting my ideas into practical action.
The main plant elements on the plan. This does not list the many varieties of berries, herbs, flowers, etc. that will be planted around the larger trees.
Like everyone else on the planet, we are on a budget. We can only afford to put part of the plan into action this year, so we thought it was smart to get started on the swales and food forest.
First, a little terminology. To quote this excellent overview, swales are "water-harvesting ditches, built on the contour of a landscape." Our orchard area is located at the bottom of a slope and swales slow water down as it moves through our property. Slowing the water down gives it a chance to soak in and do the work we want it to do: watering our trees and filling up our new duck pond.
The first step was to get a laser transit and to find the level contours along the hillside.
They are hard to see, but the orange flags mark out two swales running through our existing orchard.
We marked off the contours for two swales running through the orchard as well as a hugelkulture bed (more on that later) near the house.
We set out the swale lines in February and two months later had our first permablitz event. We shoveled out a thick carpet of wood chips five feet across and topped it off with a blanket of manure.
These swales didn't seem so long until we had to cover them with woodchips and manure!
Swales still going...
...all the way to the west edge of our property
Once we had the wood chips and manure laid out, it was time to get heavy equipment involved. We hired a contractor to come and dig out a trench 6 inches deep and five feet across and mound it over the top of the woodchips/manure swale line. He also dug out the duck pond and installed pipes underground to link the swales with the pond. When the swales fill with water after a large rain event, the excess water will be diverted to the pond.
The north swale
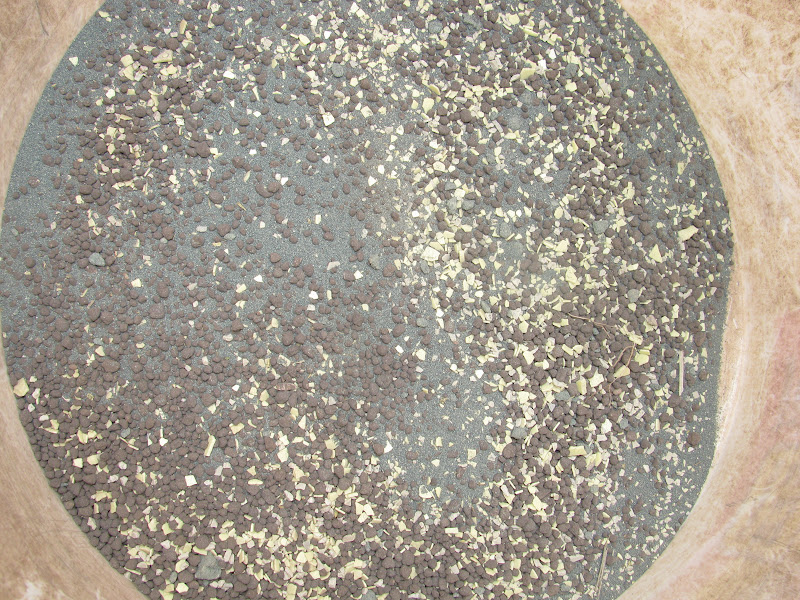
The following weekend we had our second permablitz. We had a fellow with a tractor till up the swale berms to remove the largest chunks. We also spread gypsum to help break up our heavy (heavy!!) clay soil as well as another hefty helping of manure. Then we sprinkled a cover crop (peas, vetch, lentils,etc.) over the top before rolling aged prairie hay over the top for mulch.
So thankful for friends to help us with this huge task!
We did not buy all of the trees for the food forest this year; trees are expensive! I hope to complete the main plantings this fall and next spring. The last thing we accomplished on the permablitz day was to plant the trees I did have along the berms.
One of the Chinese Chestnuts
That was one full day!
Swale doin' its thing
We got over half an inch of rain that night and got to see the swale system in action the next day.
The pond slowly starting to fill in
Still to do:
Hugelkulture bed-to-be
The hugelkulture bed up by the house needs completed. The contractor dug a ditch 24 inches deep and it is partially filled with woodchips. We will add wood, more wood chips, soil and manure to create a fertile mound to feed the black oak and Bradford pear trees we are planting as a windbreak for the house.
We have nitrogen-fixing plants (false indigo [amorpha fruticosa], seaberry, goumi, and brushy clover [lespedeza bicolor] and comfrey to plant throughout the food forest area.
Lastly (I think), I need to sow red clover on and around the pond berm. Lots of progress and lots to keep us busy.
Note: Some links included in this post are affiliate links. Click here to read our disclosure statement.
Blueberries have a reputation for being somewhat troublesome plants. The major issue is that they like acidic conditions and most of us do not have naturally acidic soil. No worries! If you plant blueberries correctly, you can give them exactly what they need and pave the way for bountiful harvests in the future.
My go-to book for all things fruit is the The Holistic Orchard. According to the author, Michael Phillips, the first thing you have to do is dig a proper hole.
Hole-y cow!
As usual when you are planting fruit, you're going to dig a much larger hole than you probably think is necessary. This hole is about 3 feet across and 12 inches deep. We currently have four northern highbush-type blueberries ("Earliblue", "Bluecrop", "Blueray", and "Jersey" varieties) and have spaced them out five feet apart in a sunny area adjacent to our tree crop plantings.
Now comes the fun part. And by fun part, I mean the really tedious but important part. Instead of adding back only the soil you just dug out, you are going to fill in the hole with materials that are going to nudge the pH of your soil in the acidic direction. Phillips recommends that you use 50% peat moss, 40% native soil, and 10% compost for a proper planting mixture.
A note about peat moss: the peat moss that you buy at a garden center is very dry and compressed. It is better to moisten it ahead of time.
My peat moss has sprung a leak!
Take the bale of peat moss and cut a hole in the top of the plastic. You can stick a hose down inside and fill the bale with water. It will hold A LOT of water. Let it sit for a couple of days to get thoroughly moistened.
We were a bit perplexed as to the best way to insure that we got the proper amounts of soil, peat moss, and compost mixed throughout the planting hole. We ended up using a 5 gallon bucket as a measuring device and filled it up with the correct proportions of each of the ingredients. It took a long time, but it was a good way of mixing everything.
As you fill in your planting hole, you also need to sprinkle in some soil amendments. Every blueberry bush received 1 cup of rock phosphate, 1 cup of elemental sulfur, and 2 cups of greensand. The rock phosphate stimulates root growth and the greensand and sulfur will help with the iron uptake/pH concerns.
Greensand, elemental sulfur, and rock phosphate
We layered in buckets of the soil mixture, sprinkled in the amendments, and gently tucked in each plant.
This freshly planted blueberry was 2 years old when we purchased it. It began bearing fruit the next year.
After we finished this project, I needed to be gently tucked into bed. Alas, my job was not done. Blueberries are one of those plants that need consistent moisture. Mulch will help keep moisture in the soil and also keep the weeds back.
Finished!
We used a mix of shredded tree branches and grapevines for mulch at the time. Now I generally use the material I clean out of the duck and chicken houses (manure + pine shavings/pellets) as mulch.
A month after planting you need to fertilize the blueberries with an organic fertilizer for acidic plants and repeat that again in the fall. In subsequent years, fertilize in the fall only. Blueberries need a minimal amount of pruning to remove old branches as they age. Easy peasy!
A year after planting we started getting blueberries! (Shown with raspberries)
Blueberries in a Permaculture Guild:
Right now our blueberries are not integrated into any other plantings, but I have been doing some research on possible guild plants that would work in conjunction with blueberries, contributing nutrients and assisting pollinators. The main concern seems to be the fact that blueberries have a very shallow root system and do not like it disturbed. Here are three discussions (Page 1, Page 2, Page 3) about plant pairings with blueberries. Lots of food for thought here.
Note: Some links included in this post are affiliate links. Click here to read our disclosure statement.
Chickens naturally take dust baths as a way to get rid of external parasites. They throw themselves down in a dusty spot and roll around until they get dirt in all their nooks and crannies. Dust baths are very effective but even so, chickens can still suffer from lice and mites. You can soup up your chickens' dust baths by providing them with a box filled with pest repellent materials. Here's how to do it.
Go and get the biggest litter box you can find.
This giant litter pan is 34.5" x 19.5" x 10". Two chickens could bathe in here at the same time. The depth is the most critical dimension. You want all your bathing materials to stay in the box when the chickens do their thing. (Ever watched a chicken dust bathe? They can go kinda crazy.)
Adding the first layer of peat moss
You can fill your dust box with any number of materials. Harvey Ussery recommends peat moss, dried and sifted clay, and/or small amounts of wood ash. I used peat moss because I had some on hand plus some sand I had left over from another project.
Food-grade DE. Do NOT use any other type of DE with your poultry.
Now for the good stuff. You can add garden lime, food-grade diatomaceous earth (DE), or elemental sulfur powder to really sock it to those parasites. Remember to wear a good dust mask whenever you work with DE. It is really fine and you'll breathe it in and irritate your lungs.
I should mention that Gail Damerow, author of Storey's Guide to Raising Chickens, doesn't think you should use DE in dust boxes for parasite prevention. Chickens can be prone to respiratory problems and breathing in DE is not a good thing for anyone. Damerow thinks you should only use DE and other heavy-hitting anti-parasite products when there is an obvious infestation. Herbalist Susan Burek has also been outspoken about her opposition to DE in her articles in Backyard Poultry Magazine. Harvey Ussery, on the other hand, routinely uses a small amount of DE in his dust box. You'll have to decide where you stand on this issue. I do generally use DE as part of my dust box mix.
I also mix a little DE in with my chickens' feed. Some people claim that feeding DE to poultry will serve as a natural dewormer. Gale Damerow has a negative opinion of that as well. She says that DE only works to kill worms, etc. when it is dry. Once it has made its way through the chicken's digestive tract, it is not dry and no longer has any of the microscopic cutting edges that serve to kill the bad guys. I still do it on the off chance that it will work!
Peat, sand, and DE, ready to be mixed
The dust box should be placed where it will stay dry.
If the mixture gets wet, it defeats the purpose. You should place it in a sheltered area or in your coop if you have room.
That's it! Pretty simple for something that can really improve your chickens' quality of life.
I've always been interested in homesteading. I'm sure it is partly the result of reading Laura Ingalls Wilder's books over and over as a child. Milk a cow? Preserve jam? Make cheese? Yep, that sounded like fun to me from a young age. I clipped articles out of magazines on growing citrus trees in pots and sighed over the descriptions of the heady scent of old-fashioned roses that I read about in library books.
And now that I am an adult with a few acres of my own to play with, I've already made quite a few of those childhood fantasies come true. The plan our permaculture designer (Steve Moring of Vajra Land Management) came up with will take us to the next level.
Some readers might be unfamiliar with permaculture and I think the easiest way for me to explain it will be to list the farm goals Lee and I gave Steve as we started the design process. Permaculture will make all of these possible.
GUST FRONT FARM'S GOALS:
- To create a resilient, food productive landscape. We know that through good design it is possible to work smarter, not harder. We want to use our land to the utmost, especially from the standpoint of water conservation. With the climate growing hotter and drier, we believe this is critical.
Our current kitchen garden is composed of raised beds surrounded by chicken runs. The chickens
really help keep bugs down and they benefit by the close proximity by getting lots of garden goodies.
- To create a more sustainable system that utilizes our poultry. Currently we are buying lots of inputs (poultry feed, fertilizers, compost, etc.) We'd like plants we could use as forage for poultry (and possibly the cattle we are getting in the future). Once we sort out fencing arrangements we plan on allowing our geese to free-range full time and our other birds (ducks and chickens) part-time. Since we breed several rare varieties some birds will unfortunately will not be able to free range (I refuse to allow coyotes to eat expensive birds), but most should get at least some range time.
The barn we built in 2014. The breeding pen fencing will also serve as a trellis for
grapes. The grapevines will provide summer shade and of course food.
-To create pond area for the waterfowl.
There will be a small pond that will be fed via a swale system through the orchard.
- Going along with the idea of working smarter, not harder: to create areas for perennial vegetables as well as more areas for annual vegetables, compost crops, etc.
Geese in the garden eating weeds
- To continue to develop our orchard, adding both more of the types of trees we have now as well as new varieties. I have been following the spray protocol established in The Holistic Orchardby Michael Phillips.
Spring-time cherry blossoms
-While we'd like to have a long harvest season, I'd prefer plants that yield their harvest all at once. For example, everbearing strawberries drive me crazy; a summer of harvesting a handful of strawberries every week is not my idea of fun. I much prefer June bearing strawberries. I can, freeze, and dehydrate the surplus before moving on to the next berry, fruit, etc. that is ripe.
Cucumbers, carrots, zucchini, and cabbage from our kitchen garden
-To provide habitat for beneficial/predatory insects and pollinators. We hope to keep bees in the next year or two.
We had five of these spiders take up residence in our raspberry patch last year. They definitely kept bug damage to the
fruit to a minimum and helped me work through my arachnophobia.
-To minimize the effects of wind and our colder microclimate. We don't have the time or desire to cosset plants that are not hardy.
- We confess that we both like plants in straight lines and everything looking neat and tidy and that sometimes permaculture landscapes look rather unkempt to us. I would like the plantings to be neater and with a bit of an eye towards ornamentals close up to the house and driveway.
Borage planted with tomatoes is beautiful and useful. Bees love it and it is a truly effective
repellent for tomato hornworms.
Our farm goals encompass the ethos of permaculture: using land in a way that is productive, good for the earth, and good for the inhabitants.
A gorgeous summer evening
I will share the plan Steve Moring came up with in detail in a future blog post. In the meantime, here are some resources that I have found helpful as we go through this process:
When I was a new duck keeper, the difficulty of keeping our ducklings' brooder clean and dry nearly made me give up waterfowl entirely. Fast forward a few years and I added an additional breed of waterfowl, the Pilgrim goose, to our homestead. In the years between I learned some tips on brooding waterfowl that will help you avoid a sticky (not to mention stinky and wet) situation.
How we brood small groups of waterfowl at Gust Front Farm:
The main difference between brooding chicks and ducklings/goslings has to do with water. Chicks may kick up shavings (and poo, if we're keeping it real) into their waterers, but they are relatively neat drinkers. Ducklings and goslings, on the other hand, absolutely revel in water. It's one of the characteristics that makes them such fascinating creatures. They splash, play, and generally make a huge mess. Water + poo + shavings = a test for the sturdiest stomach. Trust me on this one.
This is my solution to the problem.
I use a high back litter pan(this one was actually designed for ferrets) and fill the bottom with a layer of pine pellets. The pine pellets are a type of equine stall bedding and are available in 50 lb bags at any feed store. They are FAR more absorbent than any bedding material I've tried with my ducks, and I've tried many. The combination of the pine pellets and the litter pan keeps the water mess contained to one area. I cover the pine pellets with paper towels for the first few days while the ducklings learn to eat their duck chow, not the bedding. If you keep up on maintenance in this area, you've already won half the battle.
This particular brooder set-up would work for up to 10 or so ducklings. If you want to use it for more, I highly suggest installing more watering stations.
Another key to my brooder system is the recycled sour cream, cottage cheese, and similar containers I use for their water. I cut a hole in the lids in the shape of a half-circle; this enables the ducklings to get their whole bill under the water, but prevents the entire container from being splashed out. Just be sure to use small containers for the youngest ducklings and gradually increase the size as the ducklings get larger. Do the school kids in your area sell those tubs of tasteless cookie dough for fundraisers? We don't care for the cookie dough, but the tubs are the perfect size for older ducklings.
When ducklings no longer need to be kept in a brooder, all water should be kept outside, not in their housing (unless you like cleaning your duck house every day - I don't!).
Other differences between brooding waterfowl versus chicks:
- Ducklings and goslings can eat chick starter if, like me, you can't find waterfowl starter in your area. There are, however, two important considerations if you choose to feed chick starter.
1) Waterfowl should NOT eat medicated chick starter. I do not use medicated feed for any of my poultry, but it is crucial not to feed it to waterfowl as it can be poisonous to them.
2) Waterfowl needs additional niacin to support strong leg and neurological development. I use brewer's yeast as a supplement to the chick starter and it provides this key nutrient.
-We cut the chick starter with rolled oats starting at about 2 weeks of age. This decreases the overall amount of protein the birds get. That may sound like a bad thing, but it actually helps prevent a problem called angel wing that results in deformed wings.
-Waterfowl may eat greens starting at hatch. I finely cut tender grass, chard, dandelions, etc. and sprinkle it in their waterers. They go crazy! Don't forget to offer chick-sized grit. I generally sprinkle some grit over their feed when I fill the feeders and that takes care of it.
- Ducklings may love the water,but they still can drown. They aren't particularly waterproof until their oil gland kicks in, so if you want your ducklings to swim before they are fully feathered, I recommend supervised swimming time only. Keep swimming sessions short at first and towel them off before placing them back in the warmth of the brooder.
Let me know if you have any questions about brooding waterfowl or chicks. I'm happy to help!
If you walk into your local farm/feed store during this time of year, you are likely to be greeted by the sound of peeping chicks. Beware! Do NOT go and look at the chicks (or ducks, turkeys, rabbits, or whatever cute and cuddly creatures the store might be selling) unless you are prepared to bring some home. It has been scientifically proven that it is impossible to see baby poultry in a feed store without birds coming home with you. Just ask my extremely patient husband. ;) Or maybe you decided to purchase hatching eggs. I know a great lady you can buy Cream Legbar eggs from (wink).
However you decide to obtain sweet, fluffy chicks, you will need a few basic supplies and a little bit of knowledge. I will lay out those essentials in this post. Part Two, my primer on ducklings and goslings, will be out later in the week. Brooding waterfowl is different in some key areas.
Supply list:
1. A brooder - A brooder is simply a confined area where baby poultry can be safely raised under controlled conditions. It can be as simple as a large cardboard box, an old stock tank, or a plastic storage tote. Hatcheries also sell brooder kits like the one pictured below.
That brooder was fine for 17 chicks for about 2-1/2 weeks. After that time, I gradually increased the size of the area they had to roam. Day old chicks can do well with 6 sq. inches of space per bird, but you will need to increase that to 1 sq. foot by the end of the first week and 2 sq. feet per bird by 2-3 weeks of age. Chickens need 4 sq. feet of coop space and 10 sq. feet of run space per bird as an adult. They grow quickly so have a coop or at least a plan for a coop in place before you commit to getting chickens. I should also note that chicks are dusty creatures. I started out brooding baby poultry indoors, but now that I have other options, I no longer do so. My kids are also happy to have their bathroom back. Note: Chicks can and will fly. You better have a plan to keep your birds inside the brooder once they can fly (about 2 weeks of age or so for chickens). Take it from me that it is not fun to step on a pile of poo because your chicks decided to be adventurous.
2. Brooder light – Mama chickens keep their babies nice and toasty by snuggling them under their wings. Assuming you don't have a broody chicken kicking around your place, you will need to be the mama for your birds and give them heat. Brooder lightsare very inexpensive and easy to adjust for the correct temperature. You want the area directly under the light to be 95 degrees at chick level. Decrease the heat (by moving your light up) by 5 degrees every week until the temperature inside the brooder is the same as the ambient temperatures.
Place your brooder light at one end of the brooder so that your chicks can get away from the heat if they get too hot. I always make sure the food and water is in the cool zone. The best way to tell if the temperature is correct is to watch their behavior. If they remind you of a day care run amok, things are probably just fine. It is normal for them to sack out in a pile under the heat lamp every so often. All babies need plenty of sleep.
Some folks claim using a red light decreases incidences of picking,but as long as the chicks have adequate room and don't get bored, that is not likely to be a problem for you
3. Bedding - You need an absorbent, non-slippery material for your chicks to live in. I use pine shavings, which are sold in compressed bales in any feed store. They smell nice and are very absorbent. I put about 3" of shavings in the bottom of my brooder and then cover it with a layer of paper towels for the first four days or so, changing the towels daily. After the chicks have learned to eat their starter feed and not pine shavings, the paper towels are no longer necessary. Do NOT use sheets of newspaper as bedding. They can be too slick for baby chicks and can lead to leg problems. Do NOT use cedar shavings because they cause respiratory problems.
4. Chick-sized feeders and waterers - You will want an appropriate-sized feeder and waterer for your chicks. I like to start out with the small quart-sized or gallon ones and move up to larger containers like these
as they grow.
.
When you bring your chicks home, it is a good idea to gently put their beak in the water and make sure they take a sip. You can also put marbles in the rim of the waterer to make sure the chicks can't get in and drown.
5. Chick starter - Chicks need to eat food especially formulated for their rapid growth. I buy bags of chick starter/grower, though some feed companies separate out those two categories. Each chick will eat about 10 lb of starter to reach 10 weeks of age, so buy accordingly. I try to keep a month's worth of feed on hand at all times, but no more than that lest it grow stale.
6. Chick-sized grit - The chicks won't need grit until they start eating foods other than chick starter. My chicks get treats of mashed hard-boiled eggs, torn dandelion greens, and other healthy goodies starting at about one week of age. At that time I give them access to a container of grit.
Three week-old chicks enjoying a snack of mashed hard-boiled egg
That's it! It's really not difficult to get started and it is extremely rewarding. Good luck to those of you embarking on raising poultry for the first time this spring.